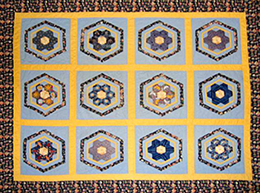
Assembling the Quilt Block
So now everything is ready to go – You have chosen your quilt pattern, picked out a color scheme, cut out your templates, and then in-turn, cut out your fabric shapes and put the material in piles either in shapes or in block order. You are ready to begin!
If you have chosen to appliqué a plain block of fabric then start with the base shape first. For example, if you are creating a flower, then start with the stem, then the leaves, then the centre of the flower and finally the petals. Perhaps if you are creating a garden quilt you can then follow on with some bees or dragonflies. Please think about the layout process before you actually start and always make sure you start in the middle of the material or at least that your stencil/template of the shape is in the right position.
If you have chosen to create patchwork then refer to your pattern and look at the block that you are starting with (should it be different to the other blocks) and start with the centre pieces, sewing them together one-by-one. Then adding on each bit as it comes up, or alternatively, if each block in your quilt is the same then you can take the following approach. This means you will be doing the same thing over and over again, however will be a lot easier and will get you to the quilting stage faster.
Building your quilt block
Look at the following diagram for a basic quilt block pattern. The principles for creating this quite simply are the same for most designs – you just need to be a little organised and know where you are up to at each stage.
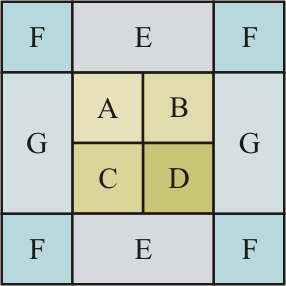
Please note:
- A, B, C, D and F are all the same size.
- E and G are the same size but must be cut in different directions
For instruction purposes I have just given them different letters.
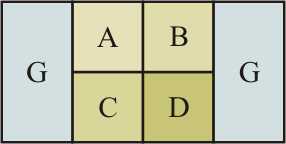
- Firstly, sew A and B squares together. As they are all the same size and square shaped it doesn’t matter which ones you use. Please make sure when you are sewing two different patterned materials together you sew them the right way up! I know this sounds super simple, but it is also super easy to stuff up! Refer to the marking and cutting fabric section if you are having problems!

- Do the same for C and D.
- Sew A and B to C and D making sure they are all the right way up!


- Sew F to E and then another F on the other side so you have a strip.

- Then sew a G rectangle onto either side of the A-B-C-D block
- Finally Sew the top and bottom E-F-G blocks to the A-B-C-D block and you have finished your block.
Quilt block assembly tips
When sewing the individual pieces of your quilt block together here are a few tips to help you along the way:
- Always make sure the right sides of the material are facing each other – it is very simple to sew one the right way and one the wrong way!
- Keep your pins fairly close together to prevent the material from slackening and creating bubbles or uneven squares.
- Press the seam before and after sewing to get an even and smooth block. This makes it much easier when you have to line up semi-assembled quilt blocks.
- When pressing the sewn seam, always press the seams in the same direction. It doesn’t matter which direction (left, right or open butterfly), however it will help with assembling the entire quilt if they are all in the same style.
| Previous: Marking and Cutting Your Fabric | Next: Assembling the Quilt Top |