Rag Quilts
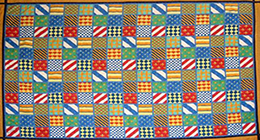
 Rag quilts are the latest trend in quilting. They are a quick, fun and different type of quilt offering a refreshing break from traditional quilting!
If you can sew a straight line you can learn how to make your one-off and unique rug. These quilts can be great for picnics, in the car, while snuggling up in front of TV, over the back of a chair or as a throw over the bottom of the bed.
This latest quilting style combines the traditional concepts of patchwork (with a twist) and unusual materials often looked over for normal quilting, such as denim, flannel or polar fleece.
Cottons and man-made fabrics are also used, however making a rag quilt is a great opportunity to use something new and generally not used in conventional quilting.
Once all the materials are chosen and assembled a rag quilt can be made in as little as a weekend. Many quilters are using them as gifts or even selling at craft fairs!
Rag quilt materials
To make a rag quilt you need materials that are likely to fray and unravel when washed vigorously. Anything with a loose weave is good, flannel is very popular or even squares made up from old jeans.
As with all quilts you are always better of buying good quality fabrics, even though you will be destroying the edges and purposely making them fray.
Typically a rag quilt is made of from reasonable sized blocks constructed in patchwork style, so make sure if you are using old material from around the home or the bottom of your quilting box that you have enough to complete the whole quilt.
The rag quilt sandwich
 Rag quilts don’t necessarily have to have batting in the quilt sandwich. If you use a heavy material such as denim, you may opt not even have batting as it will be heavy and warm enough without it.
If you do want to use batting for a denim based quilt make sure it is thin and lightweight as it will be very difficult to sew the whole quilt sandwich if you use thick batting which will be very heavy and take a long time for each individual stitch.
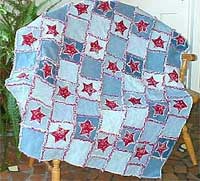
A number of quilts are made with denim on the front side and flannel of the back, with no batting in between. This is a good consistency as it is not too thick, but will still be warm and achieve the frayed effect.
If you do want to use batting then there are two really good options:
- Firstly is traditional batting. This can be bought in different thicknesses and weights depending on how warm you need your quilt to be. Be aware that the batting will make a fair amount of lint mess when fraying as it is not naturally designed to be frayed (neatly anyway!).
- The second batting option is flannel. This material is not typically associated with quilting however it is really warm, frays well and is available everywhere.
Cutting fabric and batting for your rag quilt
 After deciding on the desired size of your quilt you need to work out what size blocks you want to use.
Rag quilts tend to consist of lots of medium sized blocks sewn together, patchwork style, rather than little pieces (triangles, squares, shapes etc) in a pattern like traditional patchwork. Generally the blocks range between 7″ to 12″ in size. Remember that you need to leave a half inch to a whole inch seam allowance as there will need to be room for the fraying.
Both the back and front materials need to be cut at the same time. So if you are making a quilt based around 10″ squares then you need 10″x10″ for the back, front and batting.
It is always a good idea when making your first rag quilt to make a couple of small sample blocks (four for example) to test how well the fabric frays and even to see if you prefer batting, homespun or flannel. These little samples make great pillow cases, mats or cushions.
Rag quilts are very simple and easy to design as you just choose the number of blocks you want across the top and bottom and cut them out. If you are looking for a small lap rug for reading or watching TV a great size is to use 9″ or 10″ blocks in a 6×8 display, however it is really up to you.
When you sew the blocks for the rag quilt make sure you leave a 1-inch seam allowance so that you have a little bit more fabric for the fraying. This basically means that if you want a quilt that is 90″ by 90″ then you need to use 11″ squares, as each will lose an inch on either side. You can opt to have a smaller seam allowance however it will result in a smaller frayed effect.
Please note that if you are using batting then you will need to quilt the squares before you pop them through the washing step. If you are using flannel then this is not necessary.
Constructing your rag quilt
For this example we will be making a 4×6 quilt using 10″ blocks, which means the finished size of the rag quilt will be 32″x48″ (as opposed to 40″x60″).
OK so you have cut your top, bottom and filler into squares. Make sure everything is balanced out and that you have the right number of each color and fabric type on the top and bottom.
Place the backing squares the right side facing down, then a filler square (it doesn’t matter which way they face) and the top squares right side up. Do this for all of the square piles.
 You need to quilt each square one-by one. This doesn’t need to be a long and time-consuming job, a simple X through the middle is fine, or squares, hearts, stars, stipling or whatever you fancy. As each block will be quite small (only 10″x10″) you won’t need to tack or baste, pins will be fine.
Make sure you always leave the 1-inch seam allowance out. Don’t worry to much if you accidentally go slightly past the boarder, however if you sew right to the edge you will have to unpick. Machine sewing is usually the fastest and best way to quickly and simply quilt these blocks. Using a walking foot will help the fabric be more stable so tucks and puckers don’t occur.
Sewing with one-inch seams, join 4 sets of squares in a row. The raw edges must be turned up to and facing the top squares not the bottom/backing squares. Then press the seams open between the squares.
Then sew the rows together trying to match up the seams. Always sew with the raw seam towards the top of the quilt. It is a good idea to sew the seams open as this will reduce the bulk of sewing over seams that are turned to one side.
After you have joined the 8 rows, sew an inch inside the outer border all around the quilt.
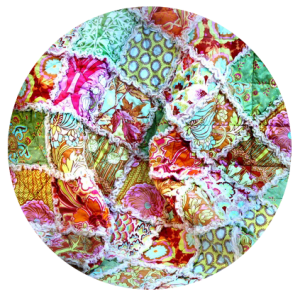
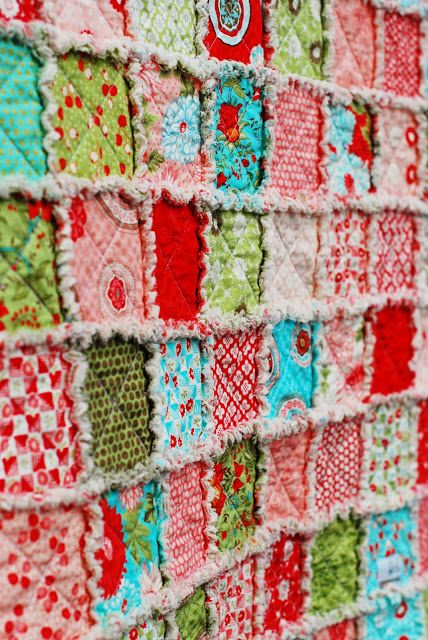
Fraying
Using heavy-duty or spring loaded scissors, cut lines in the seam allowances around 1/4 inch apart. Try to cut as close to the seam as possible without cutting it.
Once you have cut all the seams then throw the quilt in the washing machine and run it through a normal cycle. If you do not have a good lint filter in your washing machine it might be a good idea to take it to a Laundromat and put it through a cycle on their washing machine!
Once the cycle is finished give the quilt a good shake out and remove any large loose threads (you don’t have to take all the little bits off) and pop it straight in the dryer and use a pretty high heat. This will help the seams fray even more and become soft and fluffy. Once again if, you don’t have a lint trap, it might be best to do this process at a Laundromat.
Once the quilt is dry shake it outside – lots of the lint and fluff will come off. Use a lint brush to remove any excess lint and loose threads. If this is not working to well then use a vacuum cleaner, this will easily suck up all the loose threads.
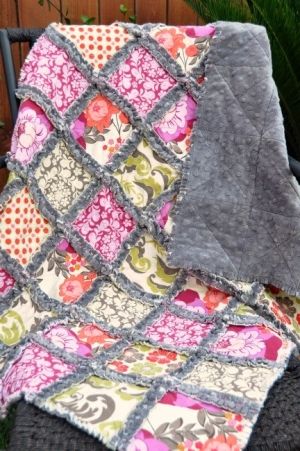
The more the quilt is washed and dried the fluffier and more frayed the seams become. If you find that you want more or less fray on your rag quilt then change the seam allowance.
A 1-inch seam will give you a pretty decent frayed edge. If you are looking for a finer and thinner frayed seam then perhaps only use a 1/2 inch or 3/4 inch seam. Again, if you want lots and lots of fluff and fray then perhaps go a little bigger than an inch, but it is completely up to you.
Just remember if you go larger or smaller than planned it will change the size of your quilt. So remember to do your math!
Rag quilt patterns
It is not difficult to create your own rag quilt design, but sometimes a little inspiration never goes astray! Download York St Quilting’s Denim Rag Edge With A Twist rag quilt pattern with instructions to help you get started.